


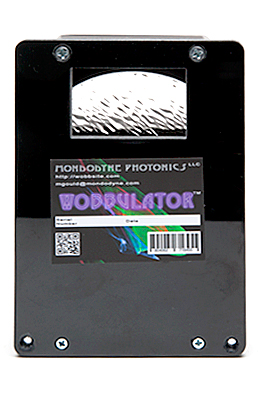


Wobbulator Documentation
Operating Instructions
View the Instructional Video
Download the Quick Start Guide
Download the Velcro Quick Start Guide
Safety
- This device does not make your laser safer.
- Laser radiation emitted from aperture when in use (Duh).
- Blank Laser before changing disc.
- Please follow all of the usual safety precautions and legal requirements applied to using your laser devices
Power Requirements
Note that the OEM power supply unit (PSU) we provide runs with 100-240 VAC 50/60 Hz input with a US-style plug. If you have other AC provided at your mains, you will need to purchase an adapter/converter. Note that the motor pulls a max of ~3 Amps.
History
The Wobbulator was originally designed by Mike Gould in the spring of 2017 at the request of A24 film production company who wanted to produce a particular special laser effect for Hereditary, now a hit horror movie. The Wobbulator can be seen in action during the scene where the actor is walking down a hall in a high school – the line on the walls and ceiling that follows him has a ripple to it that was made with the prototype Wobbulator attached to a Kvant CM3000. Visible on YouTube here:
Hereditary Hallway Scene
Mounting with bolts
The Wobbulator bolts onto the screw holes meant for the front shutter on your projector. As all projector manufacturers have different placement for their screw holes, we may need you to measure your projector and provide us with the dimensioning. We are working on building up a database of projectors and their mounts; at the least, we need the make and model of your projector when you order. If your projector has no mounting holes, see the Velcro mounting instructions below.
Mounting with Velcro
Use the included Velcro tape to attach the unit to your projector being careful to center the window of the unit to your aperture. Wipe down the projector face and the back of the Wobb with the included alcohol swab, then let dry. Note that once applied, the tape needs at least 15 minutes to adhere properly, and a 24-hour set period is advised. The tape is heavy-duty industrial grade;
more details here.
Safety Loop
Because of the wide variation in projector heating, surface finish, and other issues, there may be rare instances where the tape might fail in extreme conditions (being out in the sun all day in the tropics, etc.). For this reason, we provide a safety loop attached to the upper acorn nut of the housing - you can attach a conventional safety cable to this if you are concerned.
Recommendations for Use
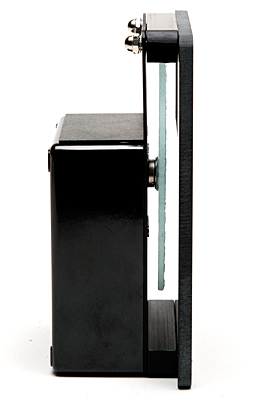
To keep costs and weight down, we use an acrylic baseplate and motor cover in the Wobbulator. Always make sure there is a disc installed before turning on your laser. You will need to adjust the settings of your laser software to avoid hitting the top of the motor cover. The top plate of the Wobbulator is made from anodized aluminum, which should stand up to the most powerful laser.
We recommend keeping your laser patterns small enough to miss the cover, and keep them oriented in the middle of your aperture.
Attaching the Discs
Make sure the laser and the motor are off. Slide the disc into the slot in front of the aperture, with the washer side towards the front. If you look through the side you can see where the motor shaft/magnet is - you want your disc's washer to engage with this. The disc will click when it is engaged. Rotate the disc to make sure it is securely attached. Then turn on the motor and crank it fully clockwise to make sure the disc is not hitting the support. Turn down the adjustable PSU to taste (we recommend as slow as possible) and enjoy your show!
Discs
Wobbulator lumia discs come in a variety of patterns, which in turn produce a variety of effects when lasers are shined through them. The discs are cut from textured glass and have their edges sanded for safety. Being glass, they will break if dropped. We also offer a plastic disc with melted-in bubbles; this is fairly durable, but may be affected if used with lasers above 10Watts. We advise always testing the bubble disc with a lower power of your lasers, ramping up to make sure they don’t let the magic smoke out.
There will be several discs available with various patterns on them, designated by their labels. Disc A is the standard lumia disc, giving the widest possible lumia pattern. Other discs have variations which range from subtle to dramatic. The discs with the least amount of texture are good for scan-through effects: try projecting a circle to get a sense of this.
The extra discs will be available soon; for the moment, enjoy the lumia from the included Disc A.
For classic lumia, use Disc A and hit it with several beams of various colors. We recommend that you don’t set up a white beam and use that for lumia – you end up with three identical patterns in three colors spaced a short distance apart. Not very interesting. Also experiment with the disc stationary, but moving the beams with your software.
Motor
The motor is a DC gear motor, rated for 12VDC ~.3A. This produces lumia that is rather fast out of the box, but may be needed for certain circumstances. Each Wobbulator is equipped with an adjustable external Pulse-width Modulation (PWM) power supply unit (PSU), which can be used to slow down the motor to maximum effect. We recommend setting it as slow as possible, which brings the rotation into a nice, dreamy flow.
You can experiment with different settings to get the effect you want, including frenetic way-too-fast full tilt. Note that the motor sometimes won’t start up properly when the speed is set all the way down at low temperatures – you may need to start at a higher setting and dial down as the motor is running.
Note that the motor is somewhat noisy, especially at higher speeds. This is normal, an artifact of the number of gears involved.
Attaching the Discs
Safety: Blank the laser and turn off the motor when changing discs.
The discs attach to the motor shaft magnetically. There is a powerful magnet mounted on the shaft and each disc has a steel washer glued to it that clicks into place on the magnet. Make sure you have the washer oriented towards the front (output end) of the Wobbulator so that it clicks into place properly.
Note that the textured side of the disc faces the laser. This is so that any back-reflection is diffracted and you don’t get a flash-back that could damage your projector’s laser diodes.
Removing the Discs
Safety: Blank the laser and turn off the motor when changing discs.
IMPORTANT: when removing discs, push down on one side of the disc to disengage the magnet, then push down the other to remove it from the magnetic field completely. You can then slide the disc out and replace it with another. You should turn off the motor and turn off the laser when changing discs. If you try to push both sides of the disc at once, you run the risk of pulling the magnet off of the motor shaft. It is glued securely in place, but excessive force could pull it off.
Warranty
The Wobbulator is warrantied for one year. If it breaks, please contact your vendor for a phone consultation and an RMA number. The glass discs are not covered by warranty, unless it arrives broken.
Summary
- Start your experimentation with the PSU set to minimum speed for best effect.
- Always test the bubble disc and diffraction unit at a lower power to make sure it can withstand full-tilt laser mojo.
- Blank the laser and turn off the motor when changing discs.
- Always push down one side of the disc to disengage the magnet, then push down the other to remove the disc.
- Have Fun!
Mike Gould
7/23/19